Rive is super powerful and can help you make interactive experiences that no other tool can create. Many of the tools will feel familiar to those who have used design and animation software, and some parts of the platform, like the state machine, are unique to Rive.
I'll try to break down the basics so that users of all levels can advance their knowledge of Rive. Feel free to skip around to what is most relevant to you.
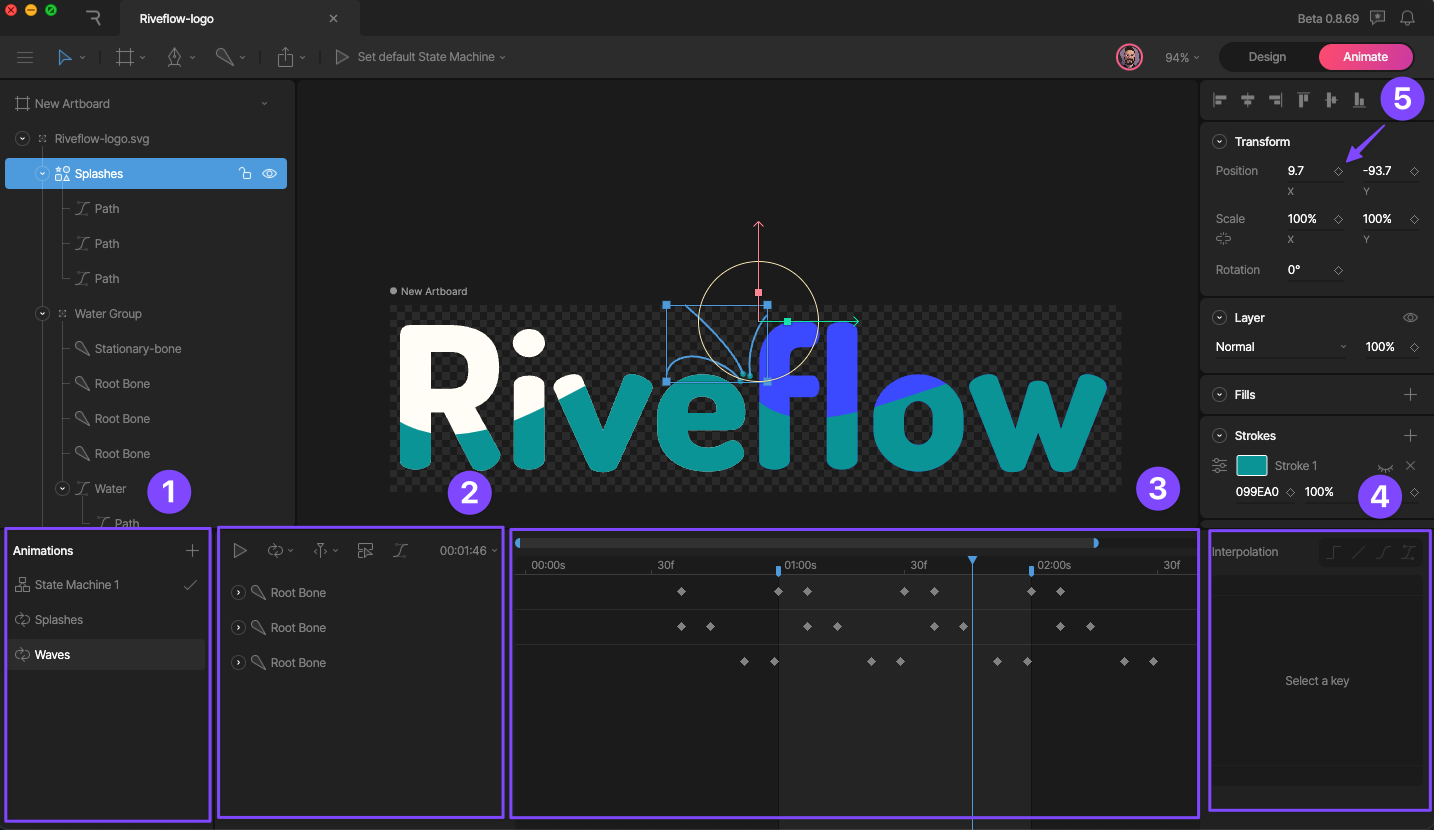
Interface Orientation - Design Mode
- Tools Panel - Create new artboards, shapes and paths, bones, and find sharing options here.
- Layers Panel - See the layers and groups in your artboard. It's a good idea to name your layers so that they're easier to navigate when you get to the animation step.
- Assets Panel - Add or remove assets here. Clicking on assets will reveal options. For example, PNG and PSD files can use webp compression to reduce file size.
- Mode Switch - Toggle between Design and Animate modes here. (Pressing Tab will switch modes too). It's important to know which mode you're in. Try not to make design changes in Animate mode unless you want to create keyframes for the changes you're making.
- Properties panel - This panel reveals properties like scale, position, fill, stroke, and other advanced properties when you select an element or group.
- Artboard - This is where you create the art and animations. It will be the final dimensions of your exported animations. You can set a background color or turn the background off to make it transparent.

Interface Orientation - Animate Mode (Timeline)
- List of Timelines and State Machines - Create multiple timelines and state machines here.
- List of elements with animation keys - Any elements that have animation properties keyed will show up in this list in the same order as they appear in the layers panel. Timeline options are at the top of this panel, so you can make your animation looping, one shot, or ping-pong, adjust the length, and set a work area.
- The Timeline - Here is where your animation keys show up. You can add, remove, move, copy and paste them as well. Expand the layers to see the keys for each property.
- Interpolation - Adjust how your animation transitions from one key to the next. By default they are linear. You can set them to cubic to give some simple easing and adjust the curve handles for greater control. You can also activate the graph editor to get the greatest degree of control.
- Properties that can be keyed - When you're on a timeline with an element on the artboard selected you'll see a diamond icon next to properties that can be keyed on the timeline. A solid diamond means there is a key for that property on the frame your playhead it currently at.
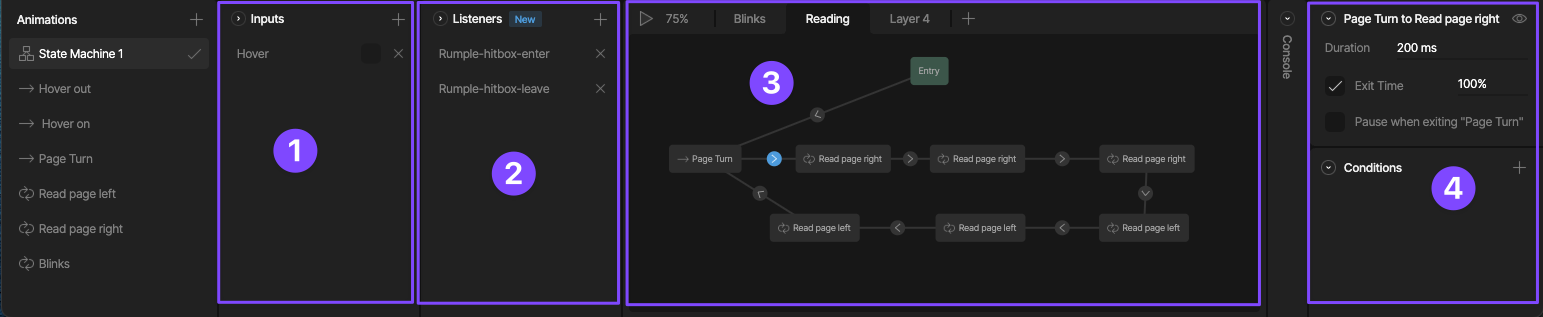
Interface Orientation - Animate Mode (State Machine)
- Inputs - Create inputs to be used as conditions for animation transitions in the state machine. Input types are Trigger (fires once), Boolean (true or false), and Number (can be any range).
- Listeners - Use elements on your artboard as listeners for actions like pointer enter and exit (hover), pointer down and up (click), and pointer move (pointer tracking). These listeners can be used to update the inputs.
- State Machine - This is the area that you can add your timelines to and determine how they transition between each other. Add layers across the top to have multiple animations playing and blending simultaneously.
- Timeline and transition settings - Select the transition arrow between two animation states to set the conditions for moving from one to another. For example, transition from one animation to the next when the hover input is true, then transition back when it's false. You can also adjust the duration of the transition and they will seamlessly change from one to the next.